Setting up a Continuous Integration and Deployment environment with Windows server 2012RC, TeamCity, GitHub, Azure websites, ASP MVC and MSTest for the absolute beginner
This weekend I set up an environment for Continuous Integration and Deployment with Windows server 2012RC, TeamCity, GitHub, Azure websites and ASP MVC and MSTest. This was my first time and I was struck by the lack of beginner tutorials. I was unable to find an end-to-end tutorial that an absolute beginner could follow. We didn’t learn this at school, I wish we had, and there are so many steps than when one of them isn’t explained it is hard to follow the rest of the steps, piecing together your own tutorial from various sources.
I’ve also made sure that everything I use is free, some of it has a trial period.
Since I already know a few things about setting up such an environment, I’ve decided to make that ultimate absolute beginner tutorial. I am by no means a pro at this, but this should at least get you started. A big thank you to Benjamin Howarth (a senior dev that is way more routine than me with CI solutions) for the awesome help.
This is a quick write up, I’ll come back to the post later this week and remove typos, add information and so on. I also recorded everything I did, so I will publish a YouTube tutorial with all the steps. Since I don’t care about pageviews and I hate it when people spread their tutorials over 100’s pages so they can publish one every day, I’m posting the massive tutorial here in one go, so you can scroll from start to finish :P You can save the page as a PDF, right click, select print, then pdf. You know the drill.
What we need for this environment (aside from your developer environment) is:
Windows Server 2012RC (preview AKA free)
VS2012 (free trial)
Teamcity (free, 3 agents)
GitHub for Windows (free)
Powershell (comes w. WinServ.)
Plus accounts for:
Azure (free trial)
GitHub (free if public repo)
MS account (free)
My developer environment:
Windows 8.1 Preview
Visual Studio 2013 Preview
How this works:
You write code on your dev machine
You push the code to GitHub
The CI server looks for changes - build steps are triggered
If the project builds then tests are built, if they build fine they are then run
Once all those things work fine, the app is deployed to Azure websites
-You can do waaaayyyy more than that- but this is the simplest example I could put together from start to end
Time to set up: Allow 5 hours +- 2 (for first time set up)
We are not using the VS2013 preview as I can’t find the download since the RTM was released, and the RTM can’t be installed on the server since that is a RC.
We are also using PowerShell, but that comes with Windows.
Setting up the Server
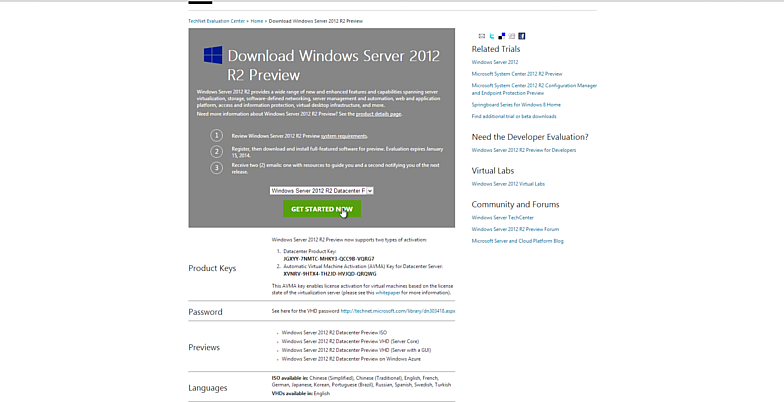
At home I have a server and have a virtual machine for my build server, production server and so on. For this example I will set up a VM so you can see how that is done, but you can of course just use the server. Download the ISO file using the installer tool provided. If you are installing Windows Server 2012 RC for the first time on a machine, you can boot from the USB. Make sure that you first test that the ISO file can be mounted, there is an error with the download tool that won’t let you mount the ISO. What you need to do is simply copy the ISO and use the copy instead. After testing that it will mount, eject the drive (under drives).
To create a virtual machine open up Hyper V (comes with Windows) and select New., virtual machine
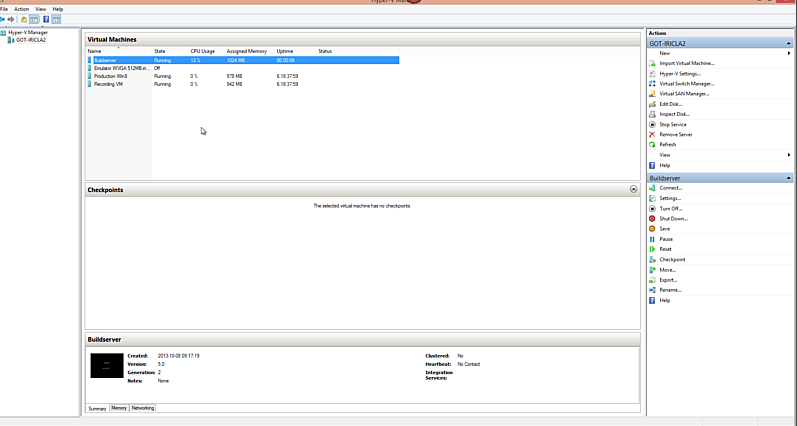
Set a name, select 2nd generation, assign 1024 MB of memory and select dynamic memory. Set networking to the appropriate one, I always select wrong and have to come back and change. Under installation options select Install operating system later. Once you finish select settings by right clicking on your VM.
Under SCSI controller select DVD drive, and then image file. Use the image file from earlier.
Right click on the VM again and select connect, once it says press any key to continue do that, and it will start booting from the image file. Select Windows Server with GUI, and new install, and put in the product key from the download page. You cant copy and paste to Hyper V, so bring the browser tab next to the VM windows and type in the key. Dashes are added automatically.
And that is it, you have your server now.
To log in you need t press Ctrl + Alt + Delete, which is a tiny button just below File in the menu.
First things I want you to do is to turn of the annoying Internet Security option by clicking on Server Manager (should be on your toolbar), the Local Server, then Turn Off IE Enhanced Security Configuration.
Check if you can acces the internet, if you can’t then your network settings for the VM are wrong. Go to Hyper V Manager, right click on the VM and under Network adapter select the right one.
Second thing you want to do is to set up Remote desktop, which allows you to access this VM by a RDP session. There are many benefits, one of them is allowing copy and paste ha ha :D
Go to Server Manager again, and under Local Server select Remote Desktop, and enable it by selecting Allow remote connections to this computer. Unselect the box below it. Click apply, and it should start up an RPD session for you. To access the VM you simply use Remote Desktop (a program), you can find it by starting to type Remote Desktop while in the new Start mode/Metro mode, Modern UI mode,- whatever MS finally decided on calling it.
Creating accounts
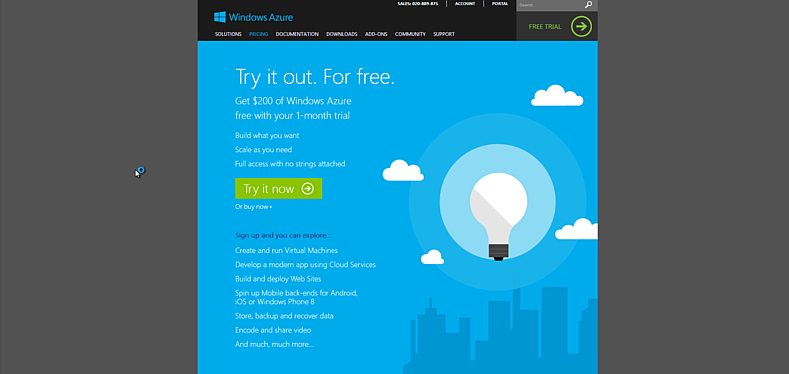
Now we need to create some accounts. You will need a MS account, but I assume you created one for the download earlier. Go to Azure and sign up for a trial, the credit card information is annoying but just go with it.
New Azure website
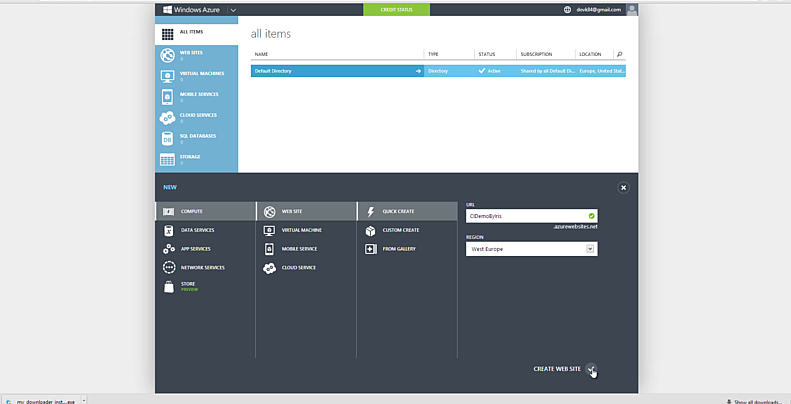
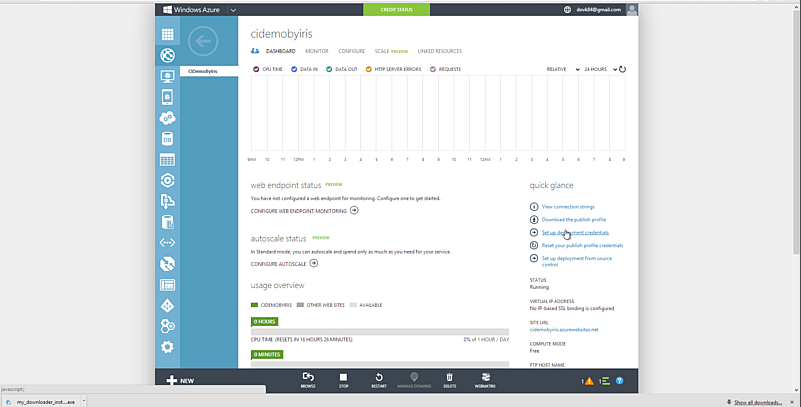
Once you are in, select Create New, Website, and give it a name. Wait a few minutes and it should be there. Download the publisher profile from the Dashboard, we need this to publish from Visual Studio.
New GitHub account
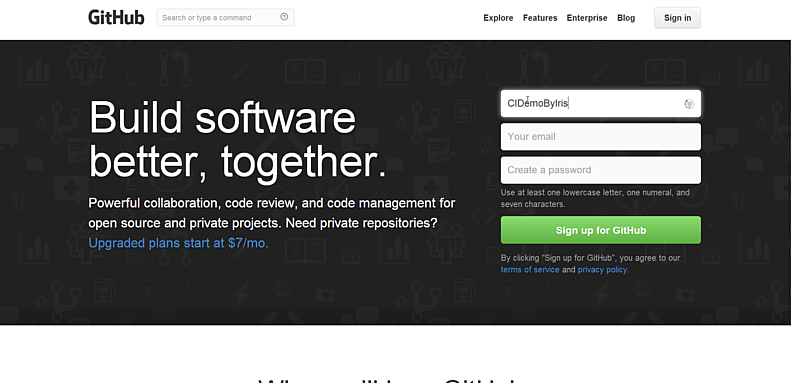
Go to GitHub.com and sign up, create a new repository. This is where our code will go, and what the CI server will monitor for changes.
Setting up Git repo on your machine
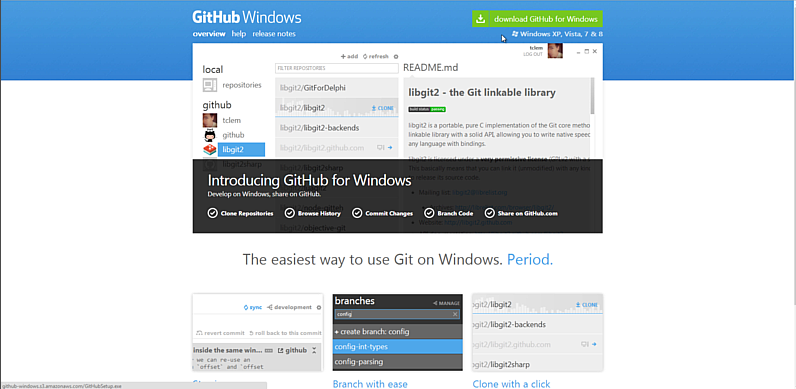
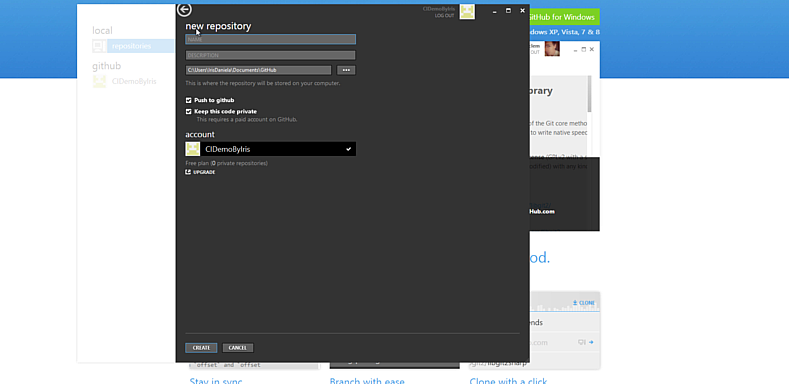
Download GitHub for Windows and follow the installation steps. Once downloaded log in and, don’t create a new repo, choose instead public repos and select the one you made earlier.
New web app
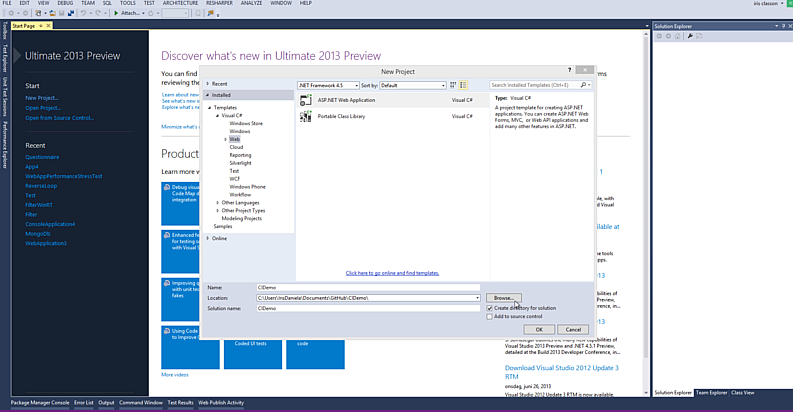
In visual studio create a new web application- set the location of the solution file to the path for the repos you created above. For me it’s Documents\GitHub\MyApp , MVC with tests. Don’t forget the tests, we need this so I can show you something cool :)
Compile and run the app so you can confirm everything works fine.
Pushing to GitHub
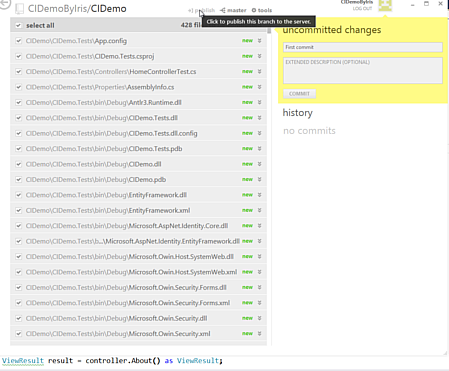
Go back to GitHub for Windows, if the repository doesn’t show any changes, go back to the mainpage, and select the repo again. It is slow to update sometimes. You should see 400 something files, that is your app. Add a commit message, and select publish branch. From now on you will have a sync button there instead. When you commit new code and select sync the code will be pushed to GitHub. However, if somebody commit ahead of you, and you are one or more commits behind, then sync will update your application with the latest code. Good to know.
Publishing the web app to azure
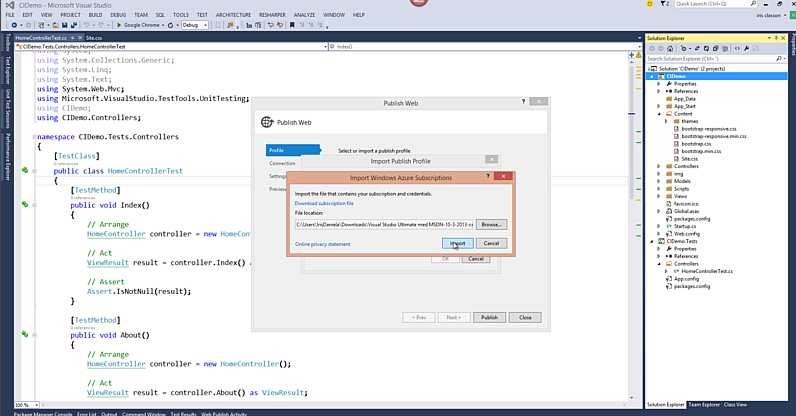
Right click on the MV project and select publish. On import select import profile, and find the profile file that we downloaded earlier. You can download it again if you lost track of it. Test the connection, and proceed. App should be up and running in a few minutes.
Setting up TeamCity
Go online, search up TeamCity download from JetBrains and select the default option on the server (not dev machine).
Install TeamCity, and use default options.
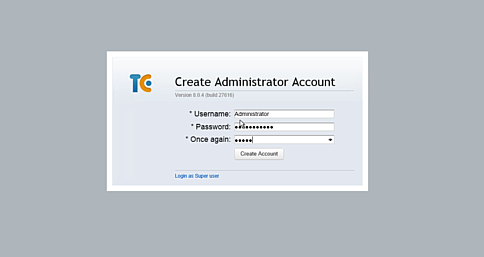
Once that is set up select Create New Project, give it a name and so on.
Select Create Build Configuration, and give it a name. Leave everything as is.
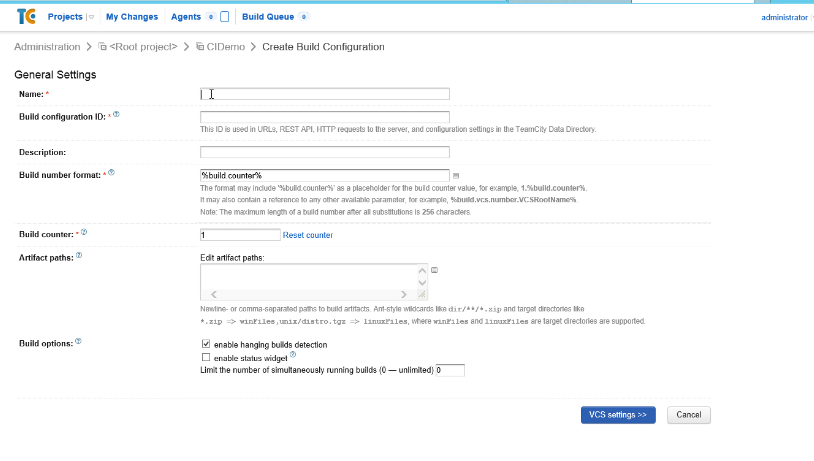
Select Create and attach new VS root, select Git.
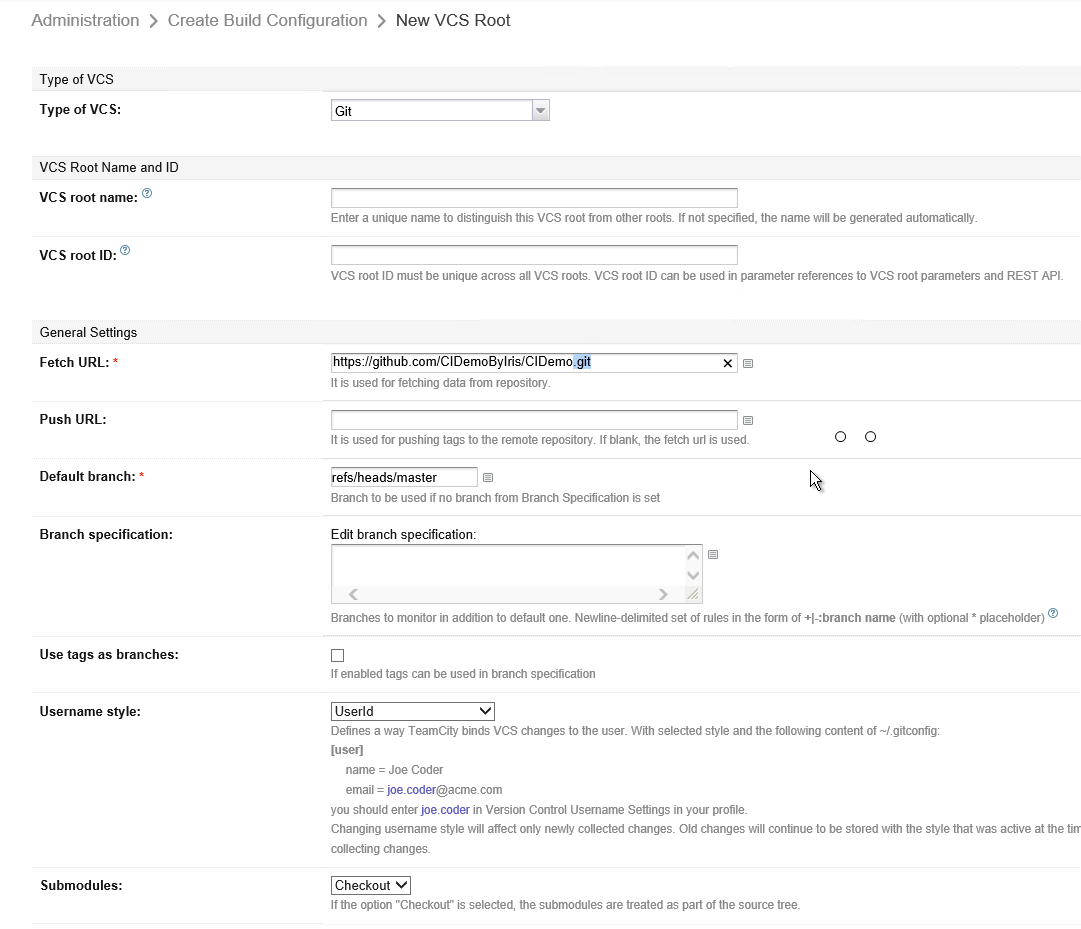
In fetch URL add the path to the repository on GitHub - don’t forget https: and add.git at the end, keep in mind that it is case sensitive! Use Name and password, and add your github account details. Test the connection, it should be green.
Adding build steps
Building the project
Save, and select Add Build Step. Choose MSBuild as runner type. Give it a few minutes and you should have a few things to fill out.
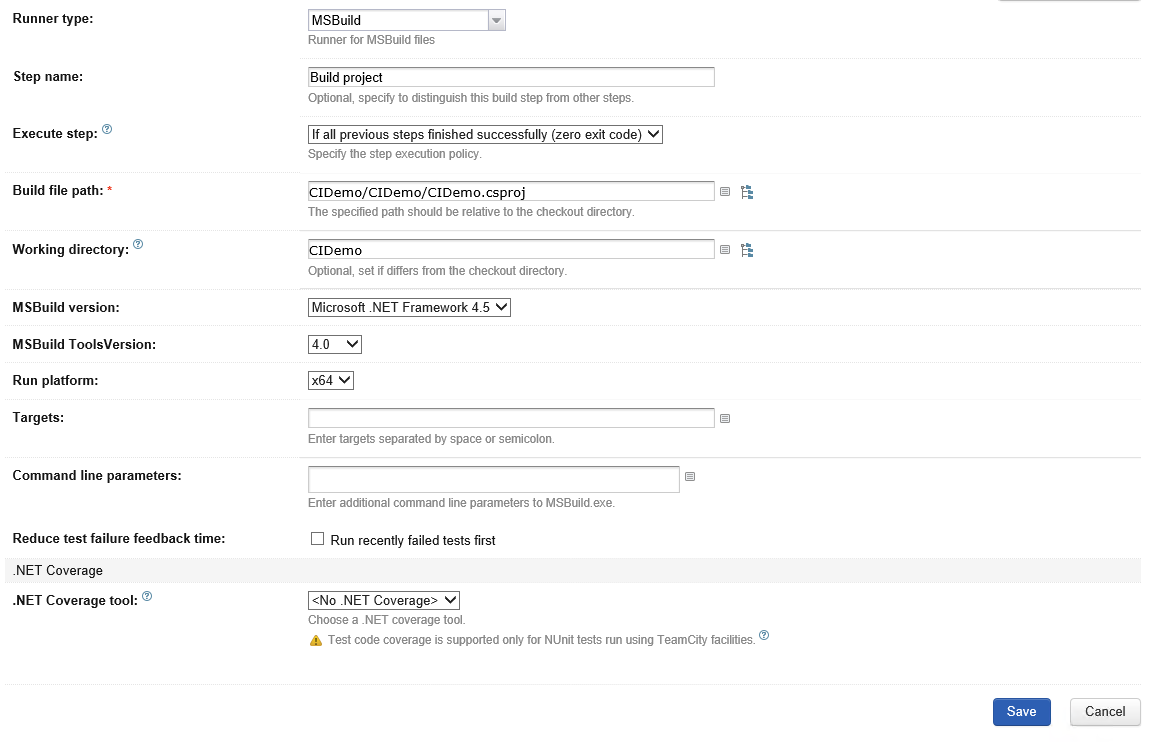
Set the Build path, for us it is .\CIDemo\ CIDemo \CIDemo.csproj , set working directory to CIDemo. You can try to expand the root view to the right, but for me it doesn’t work most of the time, so I just write the path myself. The path is the path to the build file, and we will simply use the csproj file (which is a build file) in this tutorial. You can, and should, use your own build files – but I’ll leave that for a separate tutorial.
Set MS .NET Framework 4.5, Toolsversion to 4, and platform to x64 – if that is what you are using. Then simply save.
From projects click on the little button that says run, select the project and look at the results. You should get an error, expand that and select build log. If it says you are missing web… targets , then we know what to do. You need some important DLL’s to compile you MVC application , and there are several ways that you can those. But to keep it simple now, and also because we will have a similar problem with MSTest, we will simply install VS2012 (90 day trial), which will give us everything we need.
No image of installing VS2012 is added, I’m sure you’ve seen enough of that ;)
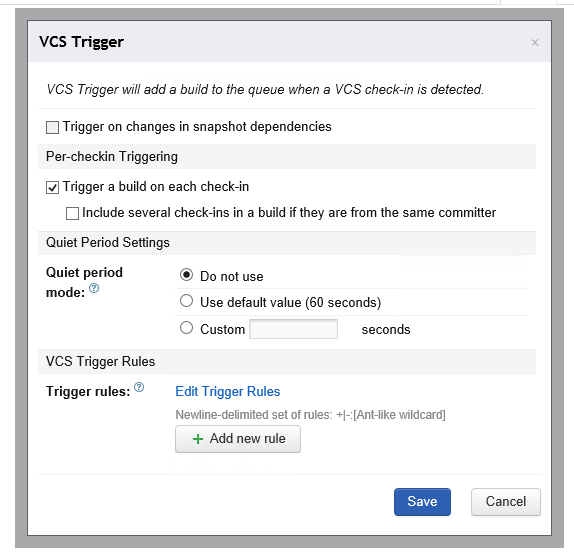
Once that is done we need to add one more thing, to trigger the build we need to add a build trigger so we don’t have to do that manually. This is done by adding a Build Trigger, and set VCS as trigger. Save.
Building the tests
Let’s add one more build step, this time for our Tests. We need to compile those. So create a new step with MSBuild, and set the path to the tests.
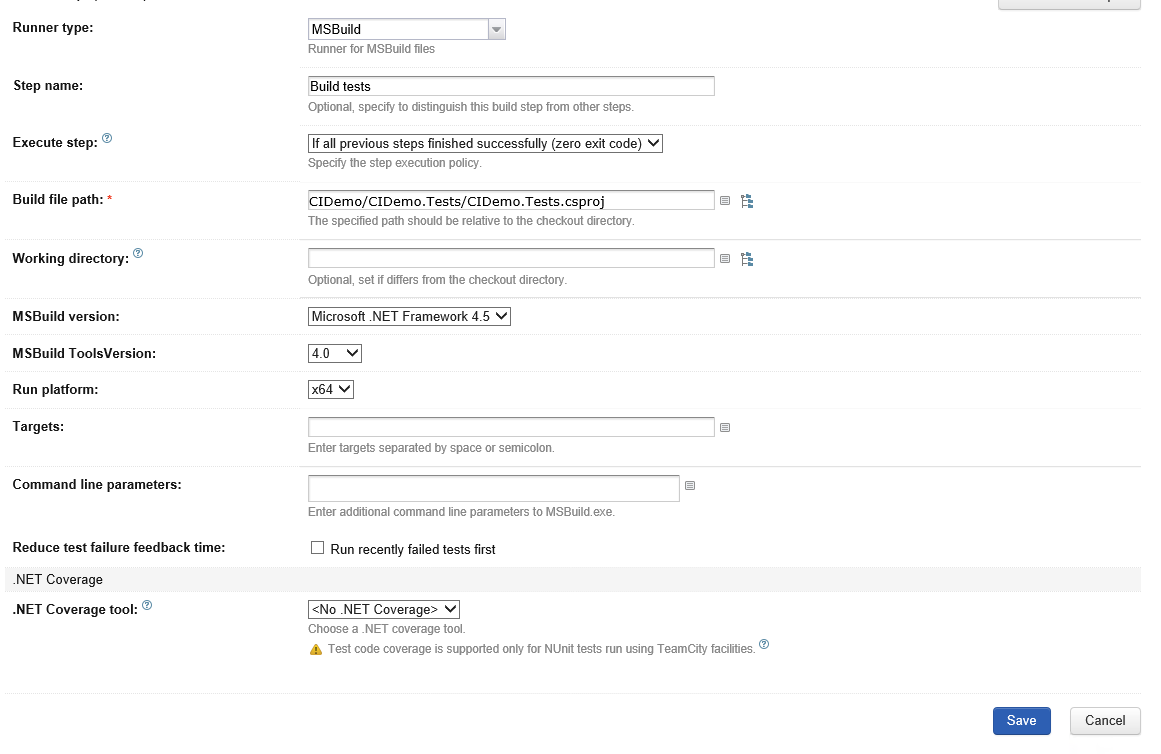
Run the builds to make sure that it works alright.
Running the tests
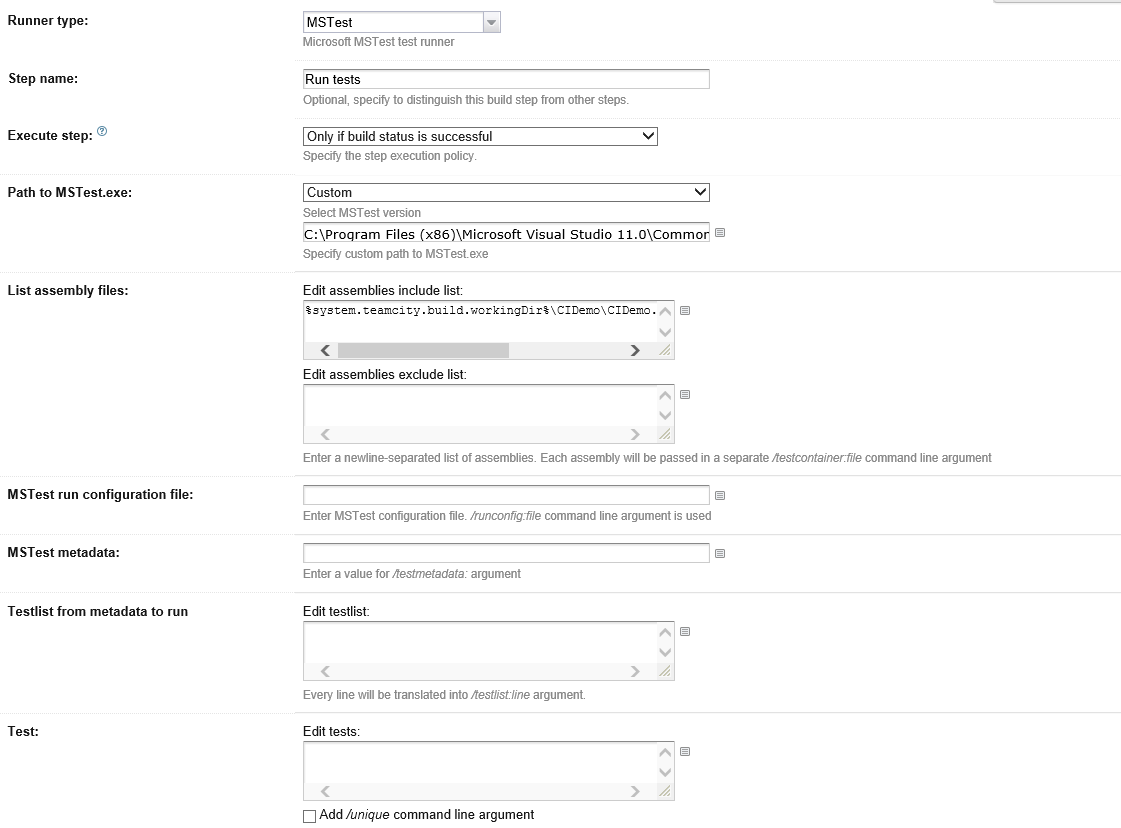
Next step is to run the tests. Add a new Build Step, and use MSTest. I chose to set a custom path to MSTest, which is:
C:\Program Files (x86)\Microsoft Visual Studio 11.0\Common7\IDE\MSTest.exe
Then list the assembly files, notice the working directory reference.
%system.teamcity.build.workingDir%\CIDemo\CIDemo.Tests\bin\Debug\CIDemo.Tests.dll
That’s it. Go to the application in Visual Studio on you developer machine, change the css (for example), save, then commit and sync the changes using GitHub for Windows.
If you go back to teamCity on the server you should after a few minutes see the build running under the project. Check that everything runs okay. Time for us to deploy to Azure websites after everything else passes.
PowerShell script to deploy to Azure:
In the project add two new files, one localRun.ps1 and one run.ps1. They will contain the deployment script, with just one minor change because I want you to see how fragile scripts can be :)
In our project under Properties we have our publishing profile, rename it to prof.pubxml or something. We will need the path to it, as well as the project build file, and the password. The password is in the profile file we downloaded from Azure.
The script for deploying looks like this:
We first define three variables that hold the two paths and the password.
Then we use MSBuild to build and deploy to azure but using the pubxml file.
Rename the *PublishProfiles* *.pubxml file to prof or something easy.
$proj = “.\CIDemo.csproj”
*$azure = “.\Properties\PublishProfiles* prof.pubxml”
**$pwd = “**PASSWORD in .pubxml file”
C:\Windows\Microsoft.NET\Framework\v4.0.30319\MSBuild.exe $proj /p:DeployOnBuild=true /p:PublishProfile=Production /p:PublishProfile=$azure /p:VisualStudioVersion=11.0 /p:Password=$pwd /p:AllowUntrustedCertificate=true
While running from our computer, the dev machine – which runs Visual Studio 2013, we need to set VisualStudioVersion to 12. One the CI server we have VS12 so we need to set it to 11 to work there. So let’s have two files, one for local deploy, and one for CI deploy. If you don’t do that it simply won’t run to the end, it won’t tell you why not either. Yup.
Confirm that it works by changing the css (for example) and running the localRun.ps1 script by right clicking on it and selecting run with PowerShell (in explorer).
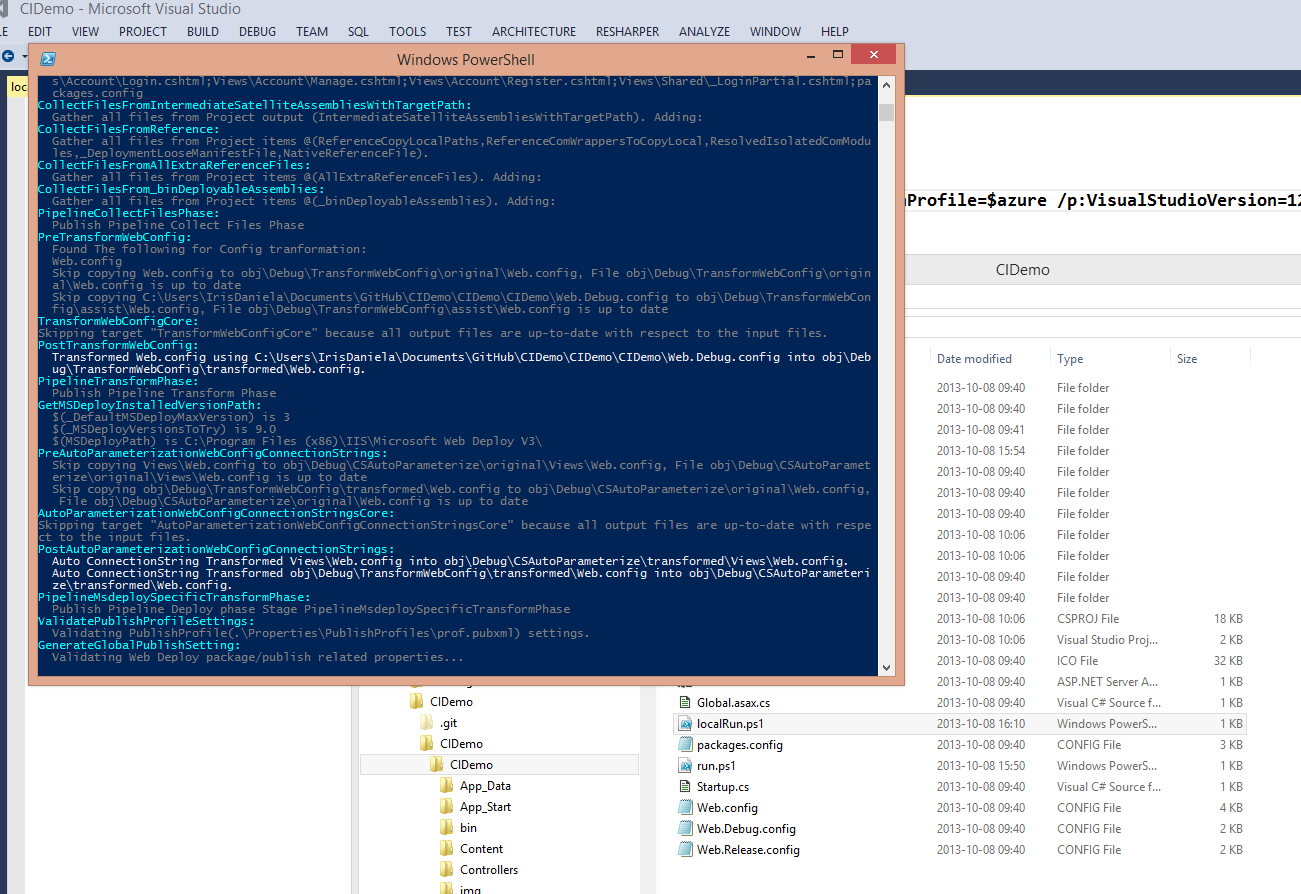
Save the files, and commit and push to GitHub.
Time to add the deploy step.
Adding the deploy step
Add a new Build Step, call it Deploy to azure and select PowerShell. Set x64, version Any, working directory to CiDemo/CIDemo , and then use the root view to locate the script file at CIDemo/CIDemo/run.ps1 .
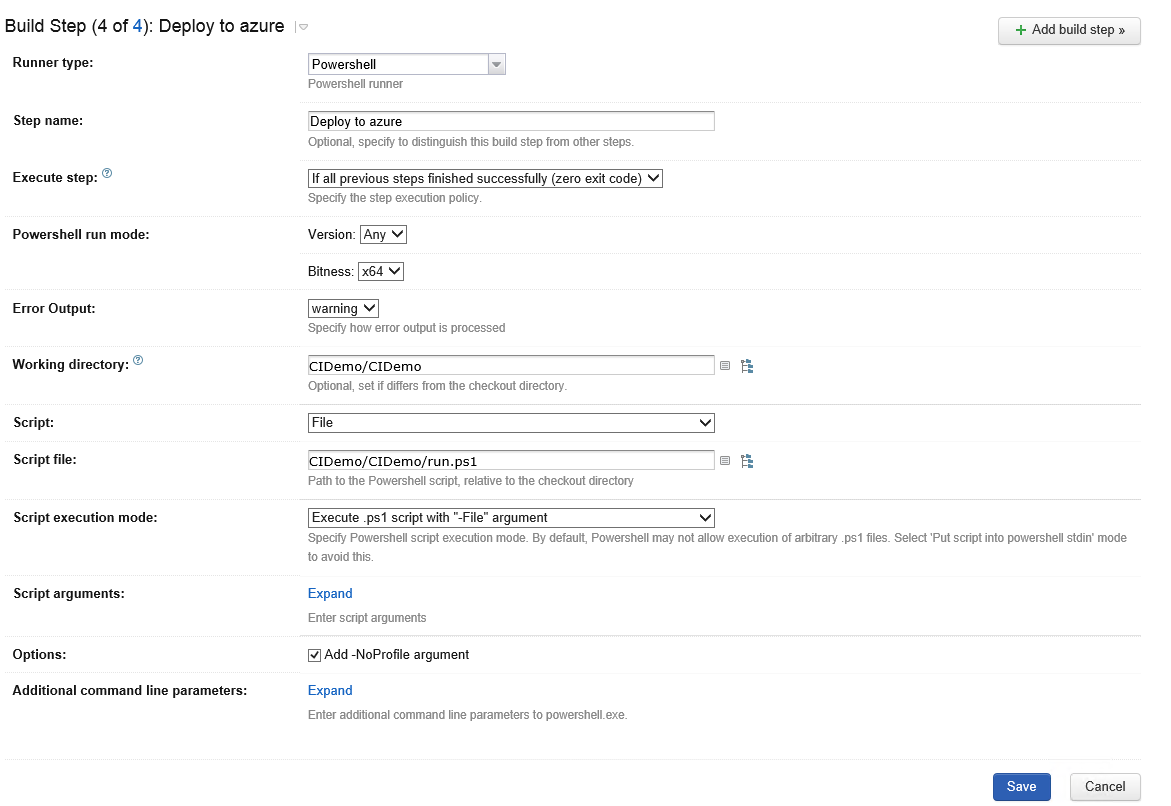
Select execute .pst script with –File argument.
Save.
All the steps:
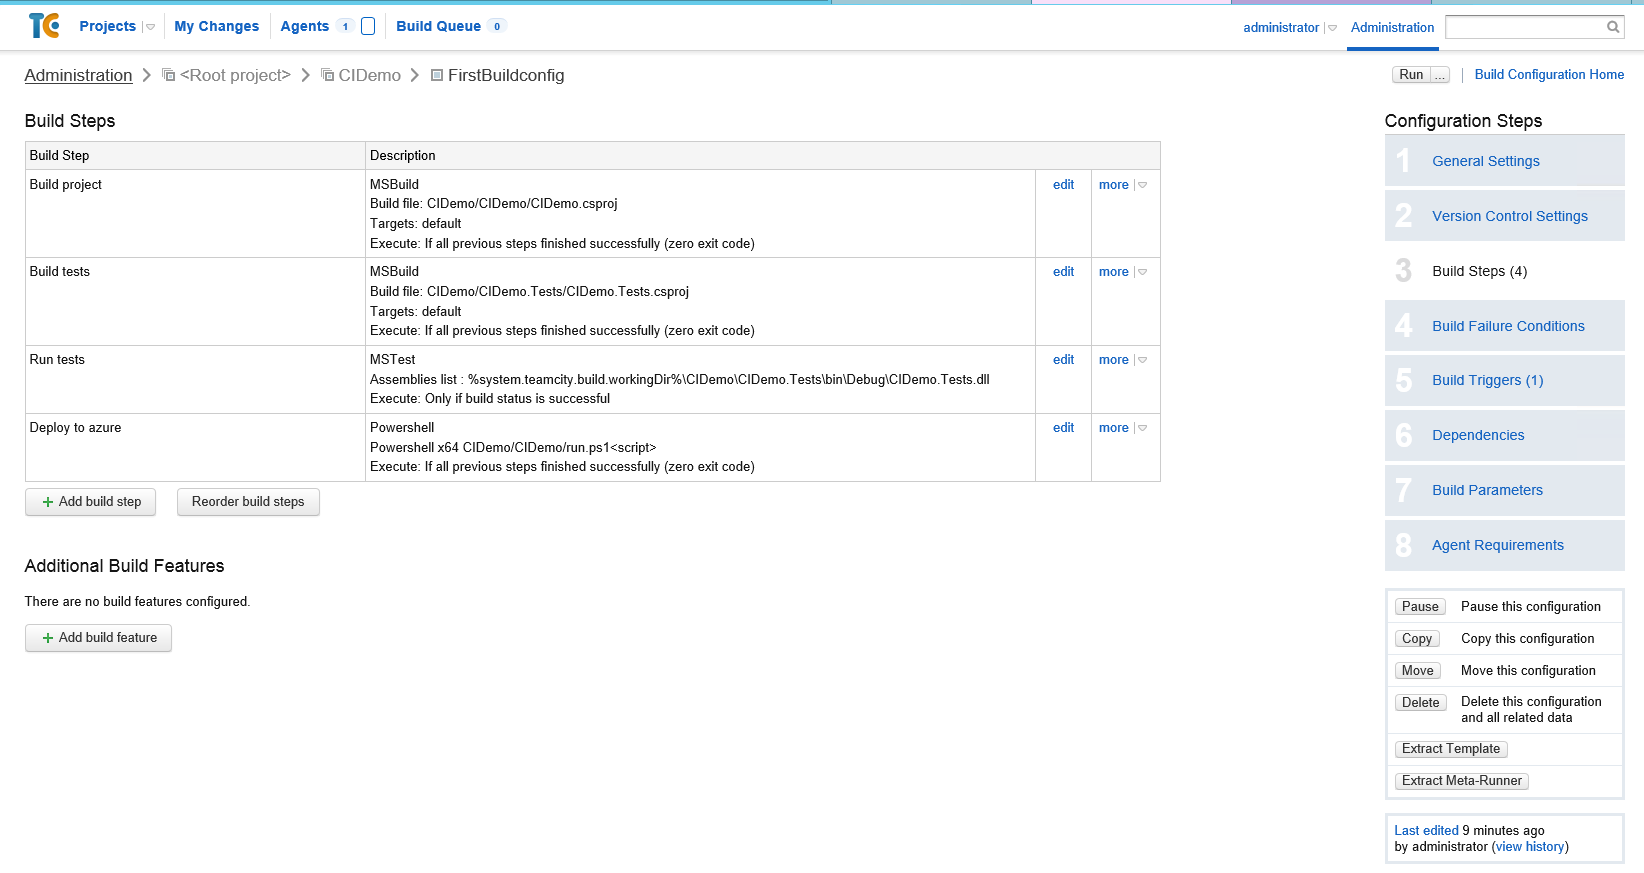
Go back to the application, do a change again, save and then commit and push to GitHub.
If everything has worked fine until this point, and I’ve explained it well enough- and you followed all the steps, then TeamCity should execute the four build steps, and your app should within minutes be updated on Azure.
That’s it.
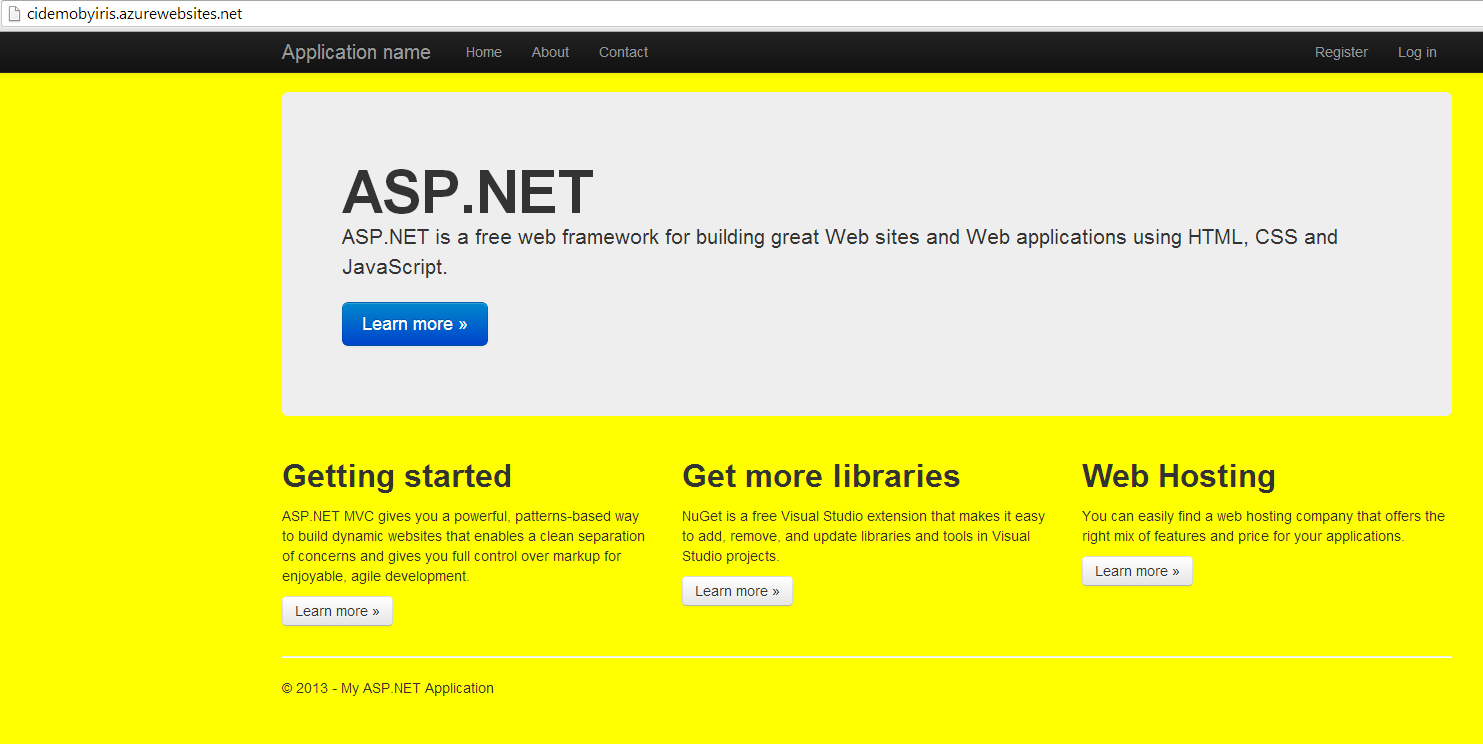
- The screenshots are from the recording, I’ll clean them up and the tutorial as well after the weekend :)
Comments
Leave a comment below, or by email. Roberto BorgeswarcodeIf you want to use more neat CI software you can replace the powershell script with http://octopusdeploy.com/documentation/features/azure
Lee EnglestoneGreat post Iris. Very useful for what i'm doing at the moment. Just thought i'd mention that you might as well turn on the jetBrains dotCover code coverage as well, as it simply involves selecting it from the .NET coverage tool drop down. I really like their code coverage report as it allows drill down into classes, methods and statements that are / aren't tested all in the build report dashboard. Cheers -- Lee
DennisHi Iris, Recently started looking into CI and had no idea how to begin. Catch across this and just started working through it. Certain areas are a little unclear and I was hoping you have a video posted on this. Is there one? D
Iris ClassonReply to: DennisI started recording but can't find the videos :(( I'll try to get a video done soon, until then feel free to ping me questions!
Last modified on 2013-10-08
